Touch switch 2 canali (DLX-KS601-2SW-TY)
Una bella placca per scatola tonda da 2 posti, con 2 tasti a sfioramento e due relè.
Aprendo la placca frontale si vede un PCB (che si separa molto facilmente dalla base) con un connettore a passo 2.54 (0.1").
Sul retro del PCB c'è il classico ESP8266EX con un chip di flash da 1MB. I "tasti" sono gestiti con un IC a 16 pin senza alcun codice stampato.
Tutto sommato promette abbastanza bene. Peccato che poi non mantenga: gli unici segnali utili che porta fuori sono i 3.3V e la massa. Per questo mi sono dovuto arrangiare con un "ragno" e dei pogo pin:
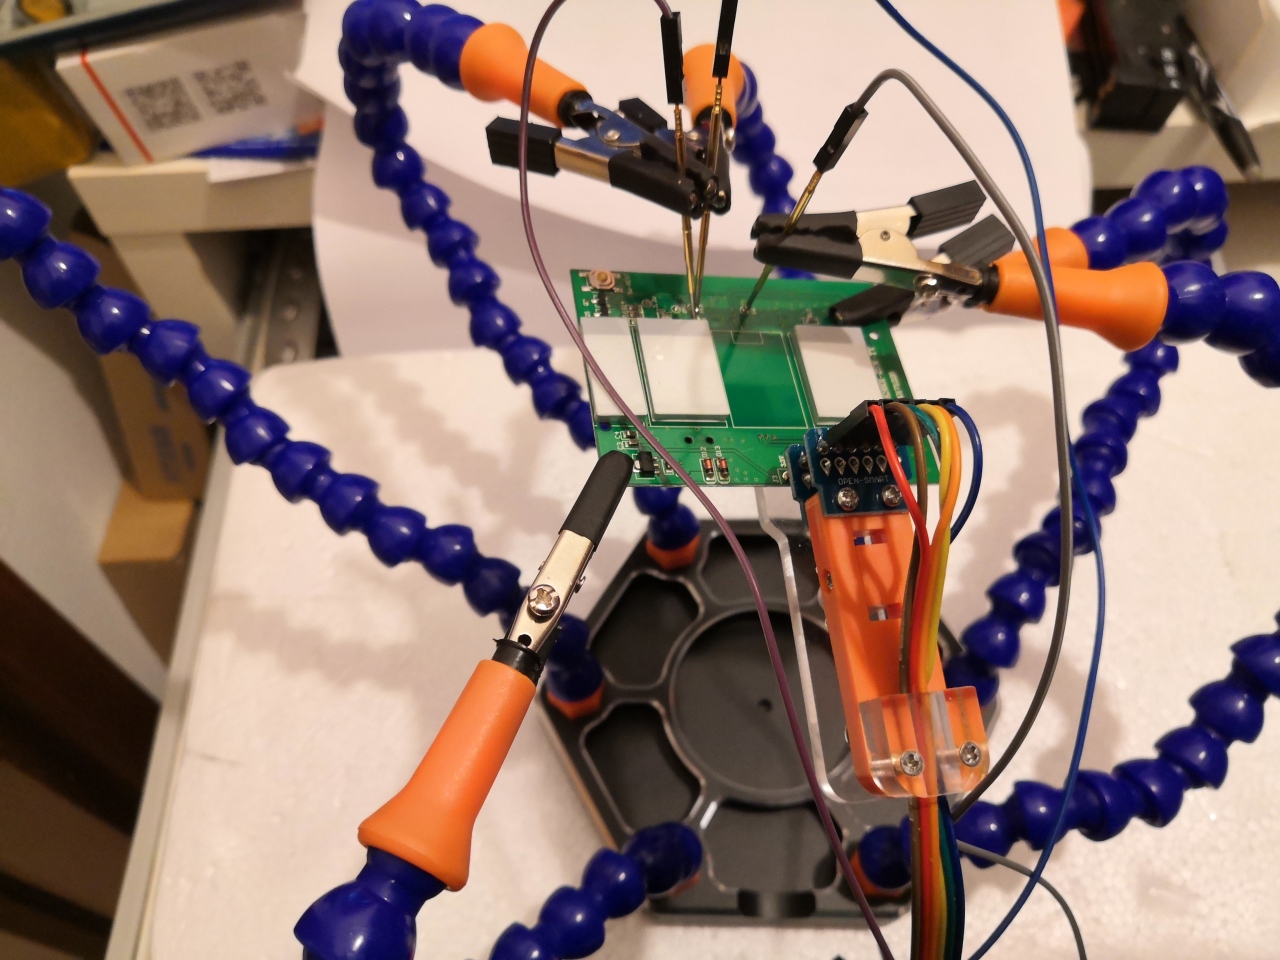
Il sistema non è proprio l'ideale, ma visto che tuya-convert ha fallito (stranamente, sembra che qualcosa sia riuscito a flashare, infatti dopo il mancato aggiornamento non funzionava più...) è sempre meglio che tentare di saldare sui pin dell'ESP o dissaldare e risaldare la flash...
Flashato l'ultimo TasmOTA via seriale (una volta impazzito per fare in modo che i pogo pin toccassero bene ma solo i punti giusti), il resto è stato abbastanza lineare.
L'unico problema è che pare che al progettista piaccia la logica diretta, quindi tutti i segnali risultano attivi alti: configurando i tasti, per diverse volte mi sono ritrovato col modulo resettato alla configurazione di fabbrica perché vedeva un tasto premuto per più di 40 secondi.
Alla fine, la mappatura completa è:
- GPIO2: LedLink(157)
- GPIO5: Button2(18)
- GPIO12: Relay2
- GPIO13: Relay1
- GPIO16: Button1
Una nota riguardo il montaggio. Si trovano (ma non sono economiche) placche adattatrici per scatola 503. Nulla per scatola 504. Chissà quali ho in casa?  Dovrò realizzare qualcosa da far stampare con una stampante 3D... O magari bastano un paio di lastre di plastica incollate opportunamente...


Commenti
Log della conversione fallita
Giusto per riferimento, caso mai servisse:
root@tuyaconverter:~/tuya-convert# ./start_flash.sh
======================================================
  Starting AP in a screen
  Stopping any apache web server
  Starting web server in a screen
  Starting Mosquitto in a screen
  Starting PSK frontend in a screen

======================================================

IMPORTANT
1. Connect any other device (a smartphone or something) to the WIFI vtrust-flash
   This step is IMPORTANT otherwise the smartconfig will not work!
2. Put your IoT device in autoconfig/smartconfig/pairing mode (LED will blink fast). This is usually done by pressing and holding the primary button of the device
3. Press ENTER to continue


======================================================
Starting smart config pairing procedure
Waiting for the device to install the intermediate firmware
Put device in EZ config mode (blinking fast)
Sending SSID                  vtrust-flash
Sending wifiPassword
Sending token                 00000000
Sending secret                0101
................
SmartConfig complete.
Resending SmartConfig Packets
........................................................
IoT-device is online with ip 10.42.42.42
Fetching firmware backup
  % Total    % Received % Xferd  Average Speed   Time    Time     Time  Current
                                 Dload  Upload   Total   Spent    Left  Speed
 99 1024k   99 1022k    0     0   7734      0  0:02:15  0:02:15 --:--:--     0
curl: Saved to filename 'firmware-1db425.bin'
curl: (18) transfer closed with 1460 bytes remaining to read
======================================================
Getting Info from IoT-device
======================================================
Please make sure to note the correct SPI flash mode!
Installing an alternative firmware with the wrong flash mode will leave the ESP unable to boot!

Next steps:
1. To go back to the orginal software
   # curl http://10.42.42.42/undo

2. Be sure the conversion software runs in user2
   # curl http://10.42.42.42/flash2

3. Flash a third party firmware to the device
BE SURE THE FIRMWARE FITS THE DEVICE AND USES THE CORRECT FLASH MODE!
MAXIMUM SIZE IS 512KB
put or link it to ./files/thirdparty.bin
A basic build of Sonoff-Tasmota v6.5.0 is already included in this repository.
   # curl http://10.42.42.42/flash3
If you want to flash the included ESPurna 1.13.5 image use this command:
   # curl http://10.42.42.42/flash3?url=http://10.42.42.1/files/espurna-base.bin
Alternatively let the device download and flash a file via HTTP:
   # curl http://10.42.42.42/flash3?url=http://10.42.42.1/files/thirdparty.bin

HAVE FUN!
======================================================
Do you want to flash another device? [y/N]

Exiting...

root@tuyaconverter:~/tuya-convert# curl http://10.42.42.42/flash2
^C
Ho dovuto uscire con ^C perché dopo circa mezz'ora ancora era fermo.
Il file salvato (che doveva essere un backup dell'originale) contiene invece diversi riferimenti a vtrust-flash, con password malgrado la nuova procedura usi un AP open... Uhm... Comunque ho fatto prima a collegare i pogo pin che a cercare di de-brickarlo OTA (ammesso che fosse possibile).